How To Truss A Chicken
Cooking in your kitchen, or out in the backyard at the BBQ, you need to know How To Truss A Chicken, it is important. It is a skill that you can use over and over! Cooking a whole chicken, or any whole poultry can be a little daunting if you haven’t done it before.
It doesn’t matter if you are cooking your poultry on a rotisserie or you roast it in the oven. This is a skill that you should have. Having it trussed properly is important, it will cook better and will be easier to handle.
But out on the rotisserie is even more important as you want a tight, compact chicken that will cook evenly and not be flopping around with some areas burning, splattering, and causing a mess.

Because of the size and shape of a chicken, certain areas cook more quickly than others. Correctly tying your bird creates a relatively uniform shape that lets the chicken cook better and more evenly.
Do you have to truss a chicken?
Do you have to truss a chicken? The short answer is of course not for the oven, but it is mandatory for the rotisserie! In order for you to get your chicken on the spit correctly without it being off-center, you need to make sure that your bird is correctly prepared.
If you don’t tie your chicken up properly the wings and legs will hang down. This creates a couple of problems; firstly, they will cook faster than the body of the chicken. Secondly, if you have a large chicken, having them hang down will impede the smooth turning of the rotisserie.
We all know what happens to the wingtips when we serve roasted chicken; they are crispy burnt! They are pretty much inedible.
Trussing a chicken for the oven will give you a more even cook there too and a prettier-looking chicken for company or yourselves.
How do you truss a chicken for rotisserie?
As mentioned it is even more important to learn how to truss your chicken for the rotisserie. For the oven, I would simply do up to the point where you tie off the legs.
To truss your chicken first, start with the chicken breast side up and the legs towards you. Using kitchen twine or good quality cotton twine cut a piece that is 2 1/2 times the length of the bird.
Starting away from you, loop the twine around the end of the chicken, making sure that you are encompassing the breast meat. To tie it off, wrap the twine around itself 4 -5 times and make sure it is pulled tight.
Next, loop the twine around the legs at the ankles and pull to bring them close to the body of the chicken.
Again wrap the twine 4 times around itself, pull it tight, and tie the legs together. Cut off the excess twine. If you are doing the bird for the oven then simply tuck the wings under the bird and you are done. If not, continue on for a rotisserie bird.
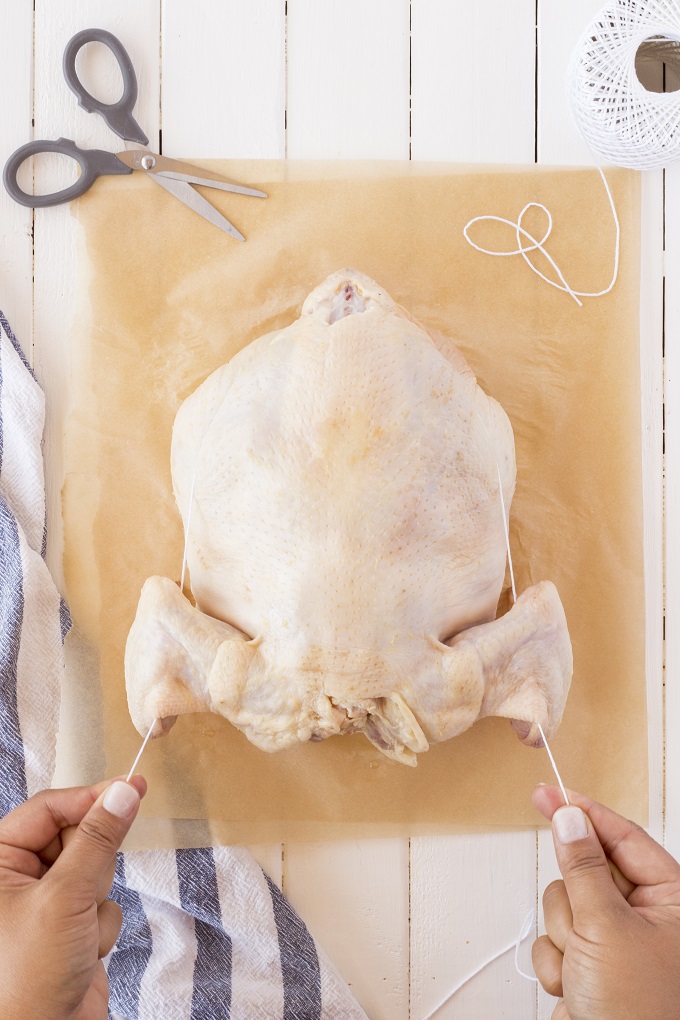
Cut another piece of twine roughly 2 1/2 times the length of your bird, then turn your bird over. With the wings closest to you, wrap your twine under the nub away from you and pull it toward the wings.
Now for The Wings
Make sure that the twine is under the wings on each side and cross the twine wrapping it 4 times itself and pulling tight. This will pull the wings in tight to the body of the chicken. Keeping the twine taut turn the chick over. This will ensure that we tuck the wings in tight to the body.
Cross over the twine and make sure it is taut. Turn the bird over for the last time, and pull the twine tight. Make sure that you tuck the wings in with the twine on that last wrap. Lastly, cross the twine 4 times over itself and then tie it with a knot. Cut off the excess twine and there you go! Your bird is ready for the spit!


Pin it HERE!!

Pin It HERE!!


Is this a video & what s best bbq to use
No, there is no video, just step-by-step pictures. The best bbq is the one that is right for your situation, whether charcoal or gas, a large grill or a portable BBQ. it really is a personal choice based upon how you BBQ.